Monday, September 26, 2011

Easy DIY: Polka Dot Painted Lampshade


The base I've had since my apartment in Boston, and the lampshade is a plain white one from Target.


I basically just bought a few different silver paints on sale at Michaels and tested them on white card stock to see how they would look. I also got a couple of different objects I thought could make cool circles.


A lot, like the mini corks I bought, were too small for this project. I settled on this round sponge brush:


I started out smushing a lot of paint on the sponge brush, and pressing it down evenly. I have things to do with my life so I wasn't going to measure out and mark exactly where the polka dots should go. I like the randomly spaced and placed dots look. If you want to measure and mark, go right ahead and send me a picture.


After the all 4 sides were done, I was all "meh..." I wanted the paint to look thicker? And, somehow, more interesting?


So I loaded on the paint and pressed it down over each dot.
It got this really cool antler or tree branch-y type look to it?


It dried and BAM. Done.

Thursday, August 11, 2011

Easy DIY: Ugly Candlestick Painting


Here is a super quick and easy do it yourself-er. It came to me as I wandered the aisles of a local thrift store.

You'll need:
- metal candlesticks. I like varying heights. I like odd numbers. 5 is too many. Unless you want a matching pair or something. Whatever. I'm not your boss.
- Spray primer
- Spray paint
- Outside place

What happened is that I was in the thrift store, considering the pros and cons of buying charming mismatched china tea cups, saucers, and salad plates. Whimsical? Dumb? I wasn't sure.

But then, but THEN, I wandered into the tchotchkes aisle.

Serving trays, Precious Moments knock-off figurines (as if the originals weren't terrible enough), things made of glass and plastic, and candlesticks.

I thought "Huh. I like this, but I don't have the kind of home where I can just go around putting brass candlesticks everywhere." Then, "I will paint them."

I picked up a bunch, then narrowed the selection down to 3 by arranging them together and seeing what looked best, like SO:

I washed them, and took them outside.


I primed them using spray primer. Paint primer would have left a lot of brush marks that really aren't going to work with this project. I guess you COULD, but you'd have to wait for the primer to dry, then sand the crap out of it. Then do it again. Not for me.

I made sure every angle was covered and that the stream of primer was even.


There must be a better way to do this, but I don't know what that is. So this is what happened to my hands.


Look! They're blue! (and on the newly stained side table! See that project here.) 


Final arrangement, avec candles.


Friday, July 22, 2011

DIY Project: The Time I Stained the Vintage Side Table


So, once upon a time I lived on a Navajo Reservation. I got almost all of my furniture at Goodwill, with the exception of the leather couch my dad bought me at basically an abandoned warehouse in Gallup, NM called Big Bears Furniture Depot or Big John's Things and Other Stuff or something.

After my first year, this kid Josh moved from the Reservation to a real place like California and he gave a lot of his crappy stuff away.
He piled up everything on his porch and was like "Hey guys, I'm leaving stuff I don't want on my porch."
I acquired a really beat up vintage side table and a crooked wooden stool. When I left the Rez, I gave a lot of my stuff away, included the crooked wooden stool, but brought the table with me to Alabama.

The table was a...meh... color, beat up, and bothered me with its 70s-ness. I hated the table, but it's still a table, you know? And who am I that I think I'm too good to need this table. I can put things on it. And you can lift off the top and there's this little tray inside, which is nice. Also, it's real wood and not particle-board or something, so, a win there.


Here is the top of the table before. It had tons of scratches and marks and sadness.

The bottom of the table before. 
It still had some varnish and clear coating on it, especially on the lower part and the tray.

So I sanded it. A lot. 
A LOT OF SANDING HAPPENED. 
It would have probably been a lot easier to strip the table instead of cleaning and sanding it. 
But stripping furniture is frightening. Also, it was a zillion degrees outside that day so 
sanding inside > using chemicals outside
 
 (Ever noticed that my dog finds his way into a lot of the photos on this blog? I don't know how, but I think he senses the camera. Also, he's very clingy.)

I bought Minwax "Jacobean" stain. It's the darkest stain that isn't black. 


Here's how staining works:
1. clean and sand wood
2. brush on even layers of stain in the direction of the wood
3. wait for a few minutes...like 5...or 15 if you want to give it more time
4.  wipe off the stain with a cloth that doesn't have a lot of lint....
5. Repeat, or don't. It's up to you. 

I don't know what I thought staining would be like, but it wasn't really what I expected. I guess I thought you brush on the stain and it dries and you're done. I had no idea you have to let it kind of soak into the wood then take it off?

I did not, repeat, did NOT sand this enough. The parts that weren't bare enough and took about 2 days to dry and I felt very foolish because I wanted instantaneous results. 
Anyway, here's what that looked like after the first stain:

After the second stain:

After it fully dried, which took way longer than it should have if I had just followed directions, I put on the first clear coat of polycrylic.

After I brush on the first coat, it dried, I sanded out the brush strokes, and put on another layer.

 After it was fully dry.


BAM! done.

Monday, July 18, 2011

The Time I Made Mint Ice Cream


So here is what happened.

I came across an ice cream maker for 50% off. So I bought it, because, obviously.

Also, I'm a stress baker. Some people drink or gamble or scrub bathtubs (I'm looking at you, college roommate). Normally, I bake things. Today it was really hot, and I had this new ice cream maker so I made what I really wanted: Mint Chocolate Chip.


 So I googled. And I found an egg-less recipe. This was important because I am both impatient and lazy. Egg-less means you don't have to heat anything up. It also means there are no eggs, so it's less of a custard base? You just throw ingredients in a bowl and stir them.

Let's go on this journey together, shall we?

Supplies

Sugar, Cream, Milk, Salt, Peppermint Extract, Vanilla Extract, Semi-sweet Chocolate Chips


1 cup of Heavy Cream. 1 cup of milk.


1/2 cup of sugar


Add Vanilla to taste. You're supposed to measure it, but, you know. I added drop by drop and taste-tested it until it was good.


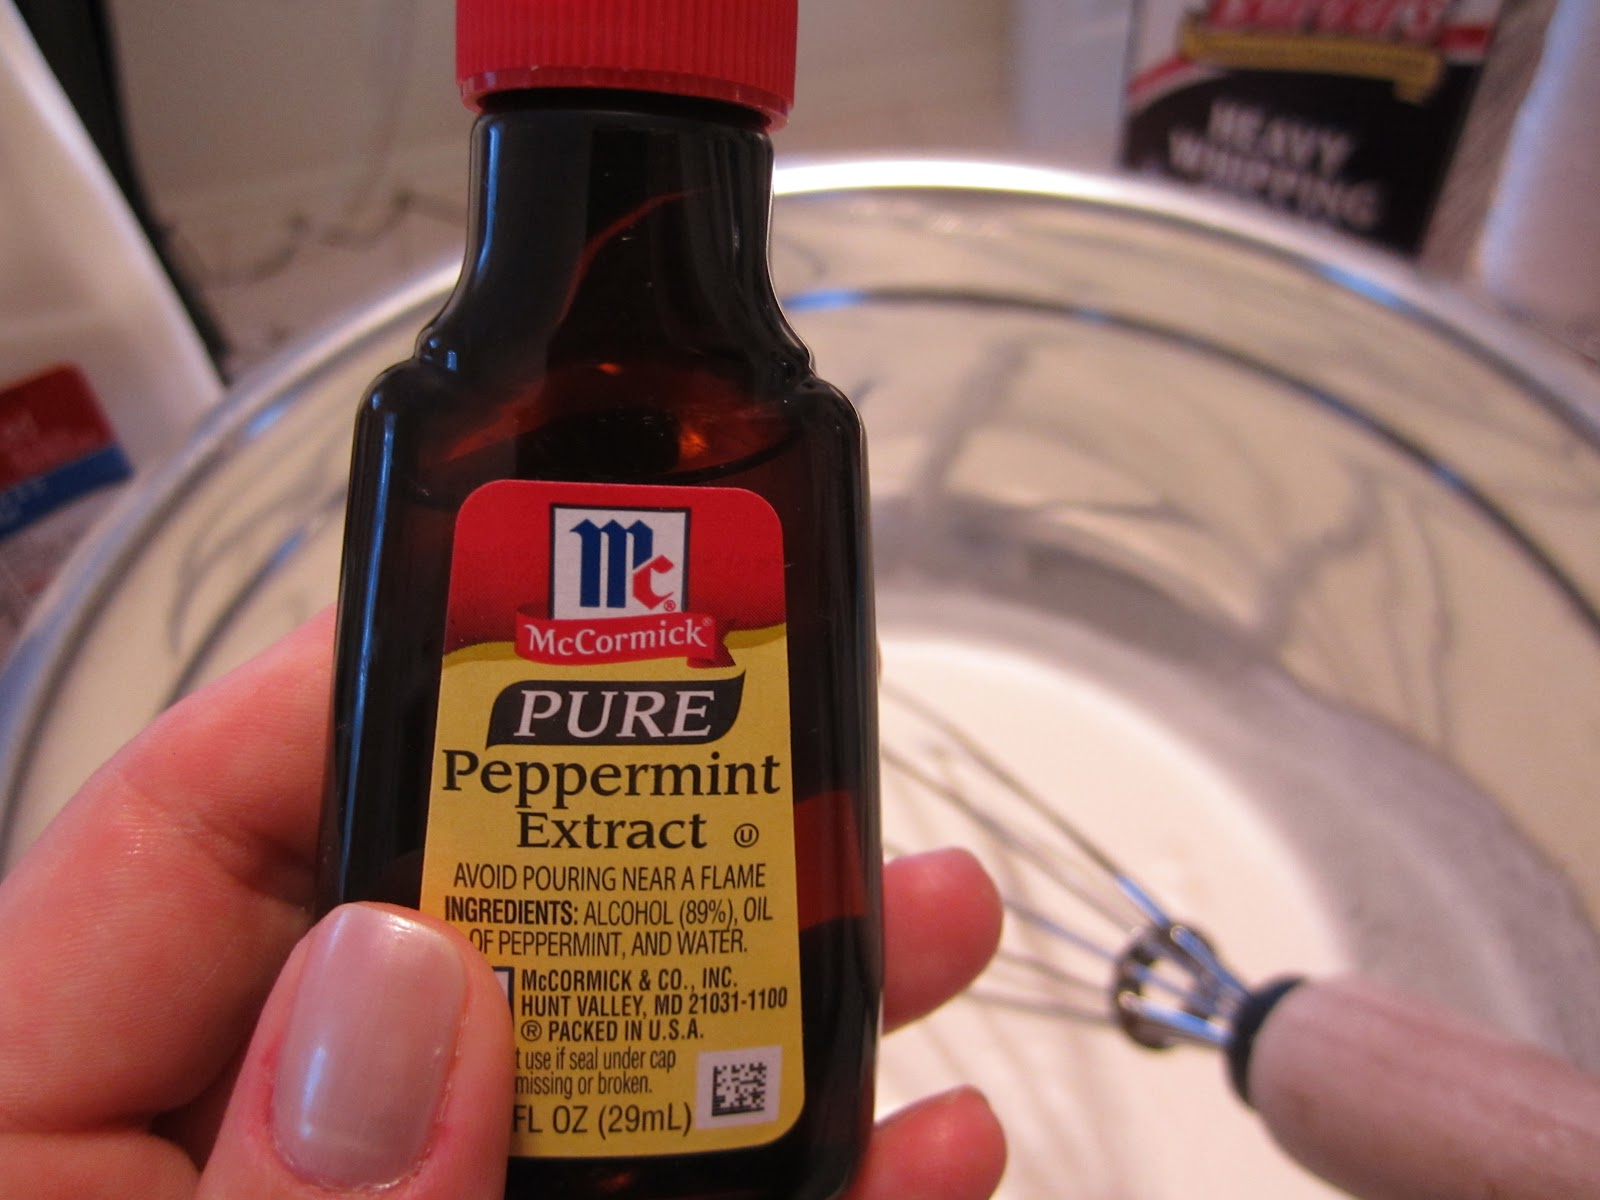
Add peppermint extract to taste (same as the vanilla, drop by drop.) This stuff is strong so take it easy. Also, in my extensive 5 minutes of research, I learned one should not use peppermint oil. Extract is where it's at. Now we know.


Stir it until the sugar dissolves.

Into the ice cream maker we gooooo...

So, you wait about 10 minutes until it's firming up a bit and then add the chips.

I thought the regular sized chocolate chips I had on hand might be hard to eat once frozen so I put some of the chips in a ziploc sandwich bag and beat the crap out of them with a meat tenderizer. I added them, handful by handful, into the ice cream maker.


I waited 20 more minutes.

If you were smart, you'd use this time to clean up.I did not. 

Instead, during this time, I got a spoon and tried to sample the ice cream while the machine was stirring. I knew this was a bad idea as I was doing it. However, I thought if I timed it juuuuuuuuuuust so I could get enough on the spoon to taste. What actually happened is that I almost broke the machine by sticking a spoon in it. So...don't do that.


I lifted off the top of the ice cream maker, and it looked like this:


I used a spatula to spoon the ice cream into 2 small tupperwear containers, and put them in the freezer.

After two hours, I took one of the containers out and made a bowl of ice cream.

Here's the Final Product!


What I learned:

- You have to freeze the bottom of the ice cream maker (I'm sure it has a name but don't know what it is) before you can make the ice cream. Probably overnight to be safe. What this means is you should always have it in the freezer JUST IN CASE the spirit moves you and you need homemade ice cream right. now.
- The peppermint tastes much stronger in the mixture before it gets frozen. Next time, I'm going to add the peppermint to taste and then add a bit more than that.
-  The recipe called for green food coloring, but I'm not a child. I knew I wouldn't be confused by something that isn't green tasting like mint. But. You do what you want to do there.
- Peppermint extract, not oil
- Don't put spoons in the mixer.

Saturday, July 16, 2011

House Music: Saturday Morning List


  • Sara Bareilles - King of Anything 
  • Ray Charles - Georgia on My Mind 
  • Gillian Welch - Elvis Presley Blues
  • Van Morrison - Tupelo Honey
  • Joni Mitchell - Chelsea Morning
  • Colin Hay - Beautiful World 
  • Ben Folds - Sentimental Guy
  • One Republic - Good Life 
  • The Avett Brothers - Laundry Room
  • Bonnie Raitt - Angel from Montgomery 
  • The Civil Wars - I've Got This Friend
  • Grace Potter & the Nocturnals - Tiny Light 
  • Eric Clapton - San Francisco Blues 
  • Amos Lee - Southern Girl 
  • Ray LaMontagne - Old Before Your Time

If Purple Chairs Could Talk

Looks at these!


These chairs say:

"Oh, hi! I'm pretty traditional but sometimes I like to convince myself that I'm fun and funky and maybe a little bit crazy!"
You've considered purchasing an electric toothbrush, mais non, too indulgent. But you might! Someday. Someday... You like to watch Grey's Anatomy and cry sometimes. "Meredith! She's an everywoman," you say to yourself.
Maybe you like to pretend that Hugh Jackman is Leopold and he's all like 'Oh, hello m'lady! Care for a carriage ride? Also, I have purchased you several expensive gowns and would like you to wear one for a fancy dinner!' and you're all like 'Oh, Leo, you shouldn't have! But thanks! I'll take them!'


Anyway, I don't have any room for purple anything in my house so I'm not going buy these.
But someone should.
Maybe you!

Friday, July 15, 2011

DIY Project: Prime and Paint Gross Bookshelf

Things I know (not a comprehensive list):

a. I have no money.
b. I want my house to look nice.
c. I want to have cute things in my house.
d. I have no money.

A solution to problems a and d is to buy cheap stuff.
A solution to b and c is to make that cheap stuff look nice.

I saw a bookshelf at a thrift store. It was $5.88.

And I was all like "Hey, I should buy this ugly bookshelf and paint it a nice color and put it under the wall of picture frames in my house!"

...and so I did. And so I did.


Here is the before!
I know. 
Right now, you are all like "Betsy, why did you buy this?" 
Because it was 5 dollars and 88 cents.


The first thing I had to do was clean it. You can buy a spray to do that. So I sprayed the stuff on. I wiped it off. Boom.Clean.

The next thing I had to do was sand the crap out of it. Because the surface was uneven and weird. So I did that. That took longer than I wanted, but eventually I evened things out.

I got some primer. I painted on a coat with a paint brush.
Waited an hour.
Sanded the primer.
Waited 2 hours.
Sanded it with a really fine sandpaper. (to get some larger brush strokes out)

I probbbbbably didn't sand it as much as I should have, but these things happen.


This is what it looked like after the primer:


I bought high gloss black spray paint because I wanted it to be shiny.


This is what it looked like after first coat:

And after the second coat:


In its new home, empty.


In its new home, with THINGS, you guys:


(Ed. note: I just piled a bunch of stuff in there.Other things will end up filling the shelves. I know we were all very concerned.)